2. Add Authorization data to Oso Cloud
In the previous section you uploaded a policy to Oso Cloud. However, policies are only effective if they have data to enforce. What does this mean? Simply put, you must tell Oso Cloud some concrete facts about who and what exists in your application. Oso Cloud then uses that information, along with your policy, to make authorization decisions.
In this section you will:
- Identify what data you’ll need for authorization.
- Write authorization data as facts.
- Use the Data page (opens in a new tab) to store authorization data in Oso Cloud.
Identify Data Needed for Authorization
Look at the rules related to a particular resource to get a sense of the data you'll need for authorization. In the example policy we provided, there are two rules contained in the Organization resource block.
actor User {}resource Organization { ... # Rule definitions for roles that # are part of your Organization. "employee_view" if "employee"; "admin_view" if "admin";}
Both rules are created from the same type of information: a permission assigned to a role. What is not obvious from rule statements alone, is who these rules will apply to.
In Polar, when you write rules for roles inside a resource block, any defined actor can be the who for the
given rule. In this case there is one defined actor type: User.
Putting this all together yields the following information needed for authorization:
- Who the user is
- What organization they are part of
- What role they have within the organization
Action Items
Write Authorization Data as Facts
The table below provides concrete examples of the information identified as necessary for authorization. You can use this information to write the facts you'll store in Oso Cloud.
| User | Organization | Role |
|---|---|---|
| Paula | Org 1 | admin |
| Greg | Org 1 | employee |
| Ashley | Org 4 | employee |
Use the Data Page to Store Facts in Oso Cloud
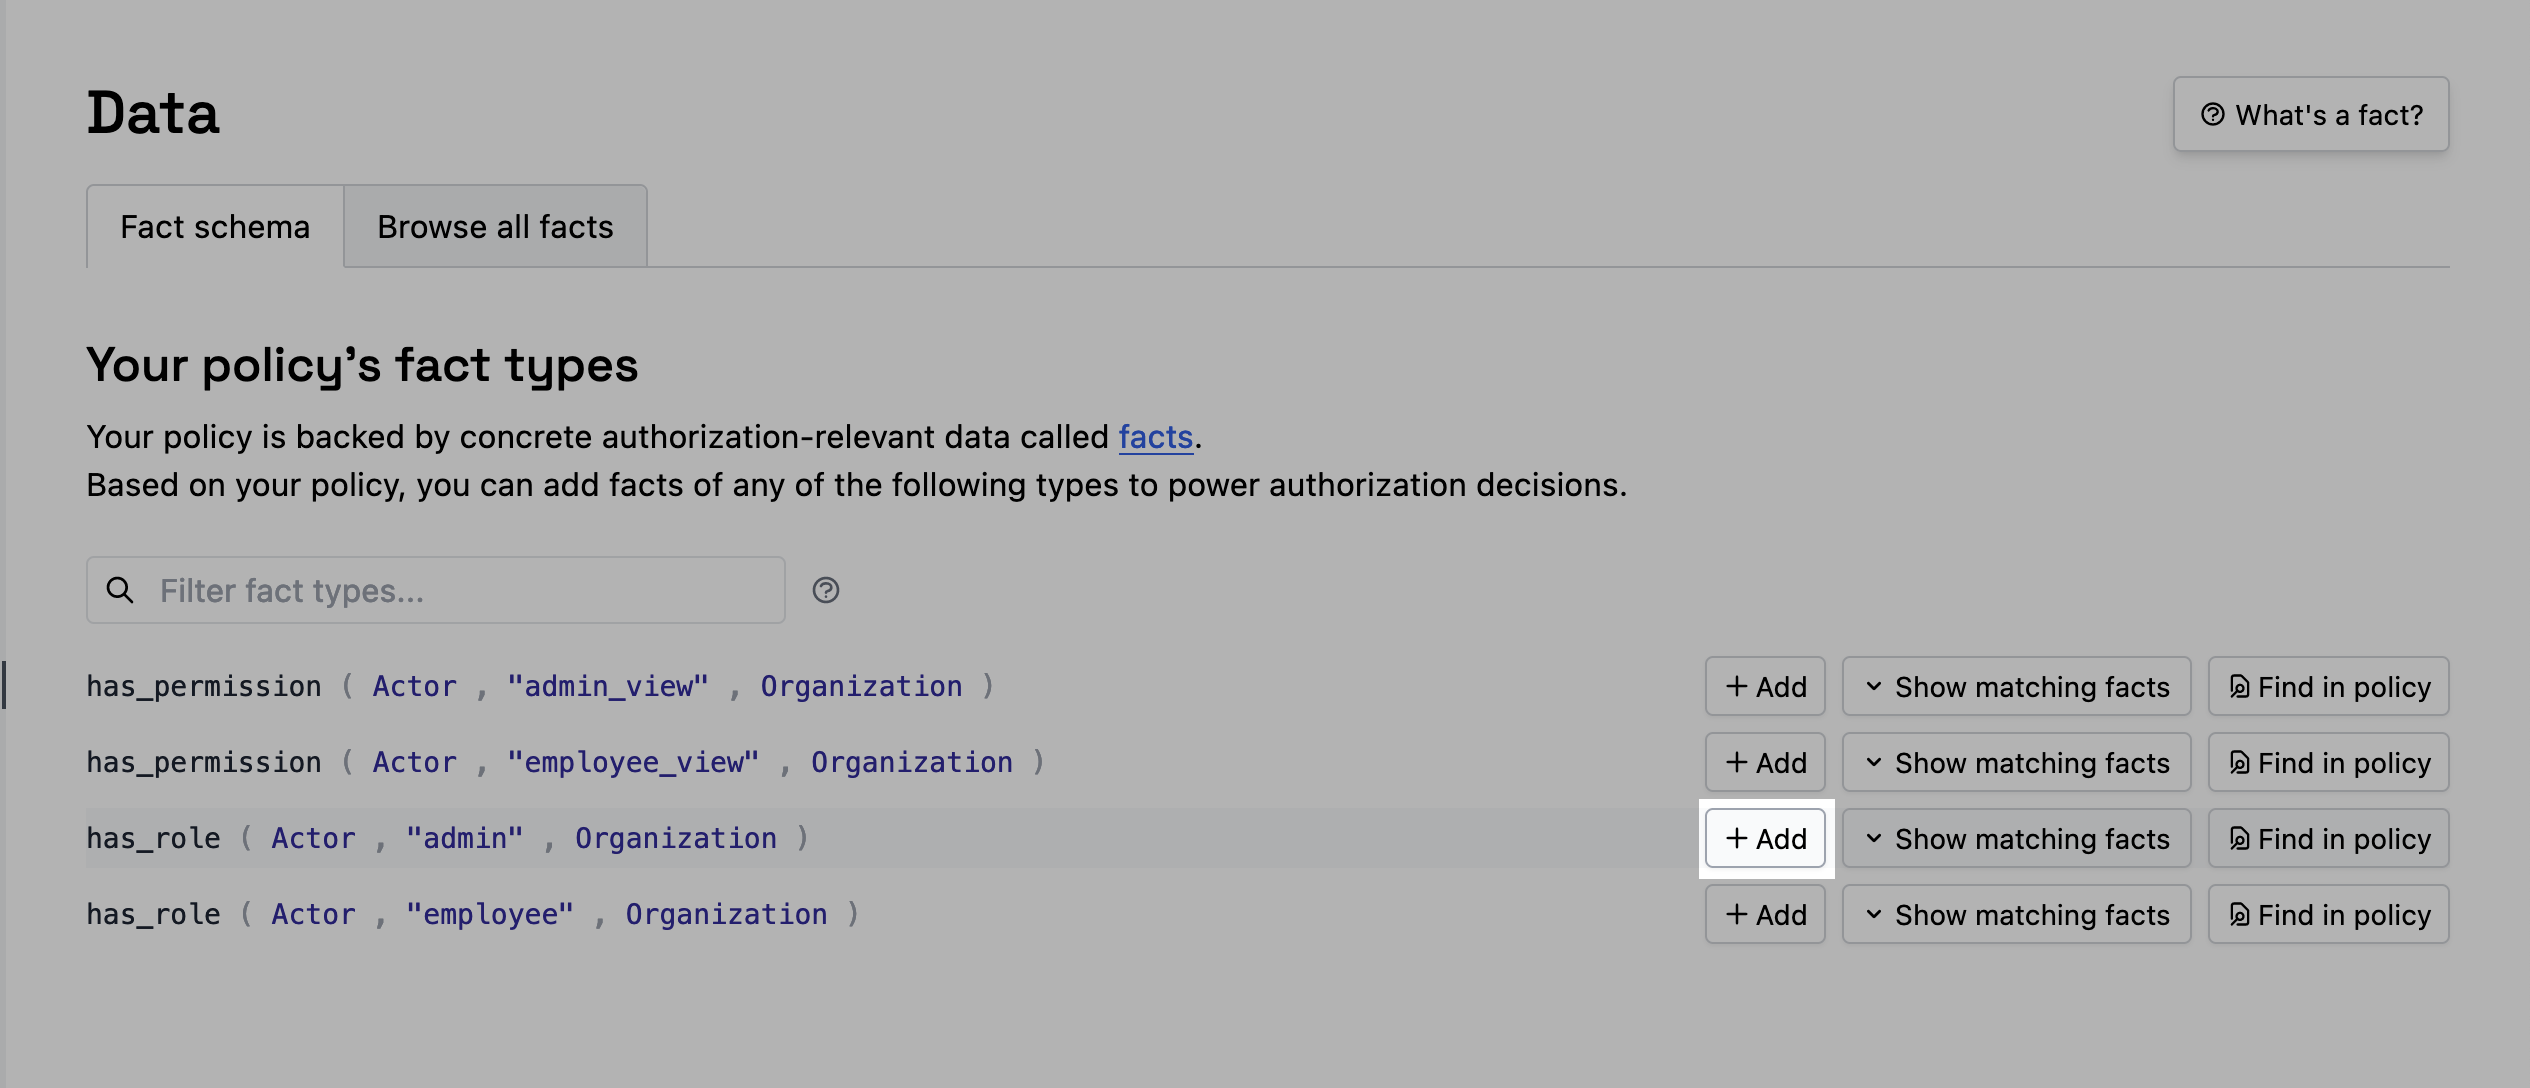
Navigate to the Data page (opens in a new tab) in your Oso Cloud environment. This page shows you all the different types of facts that your policy uses. You can use this page to add facts of any of these types, to view all the facts of each type, or to see how your policy uses a fact type.
We'll need to add one has_role(Actor, "admin", Organization) fact for Paula, and one has_role(Actor, "employee", Organization) fact each for Greg and Ashley.
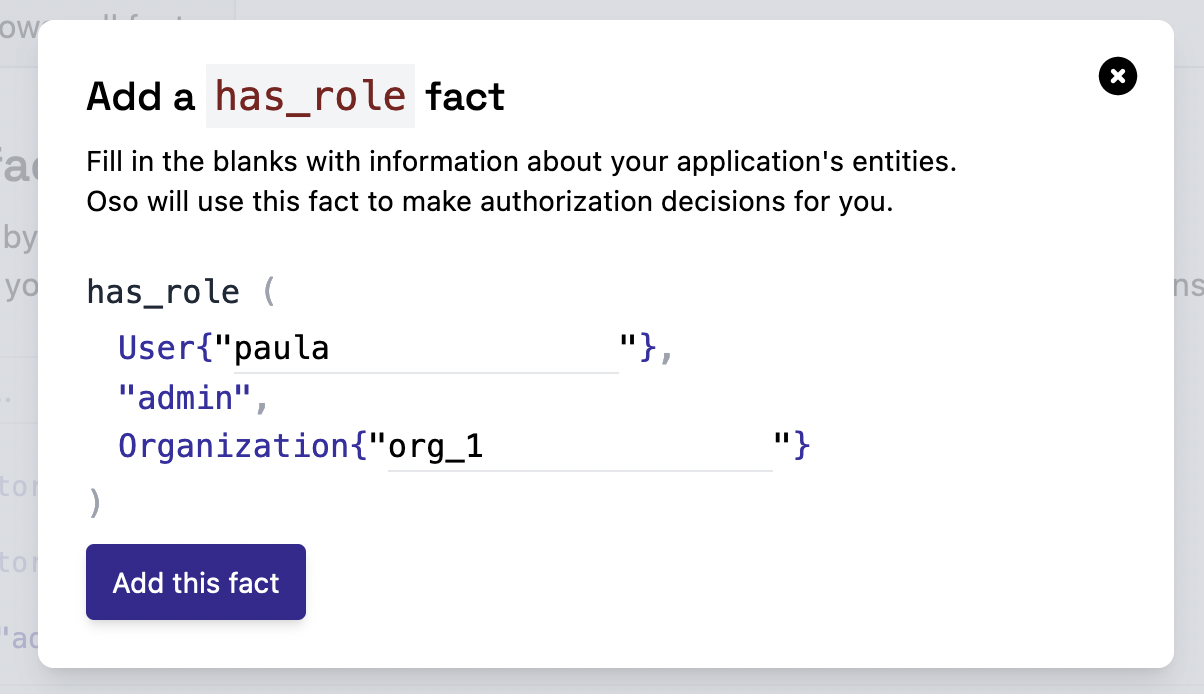
First, let's tell Oso Cloud that Paula has the role admin within the Org 1 organization.
Find the has_role(Actor, "admin", Organization) fact type in the list, then click "Add".
Enter paula as the User ID and org_1 as the organization ID, then click "Add this fact".
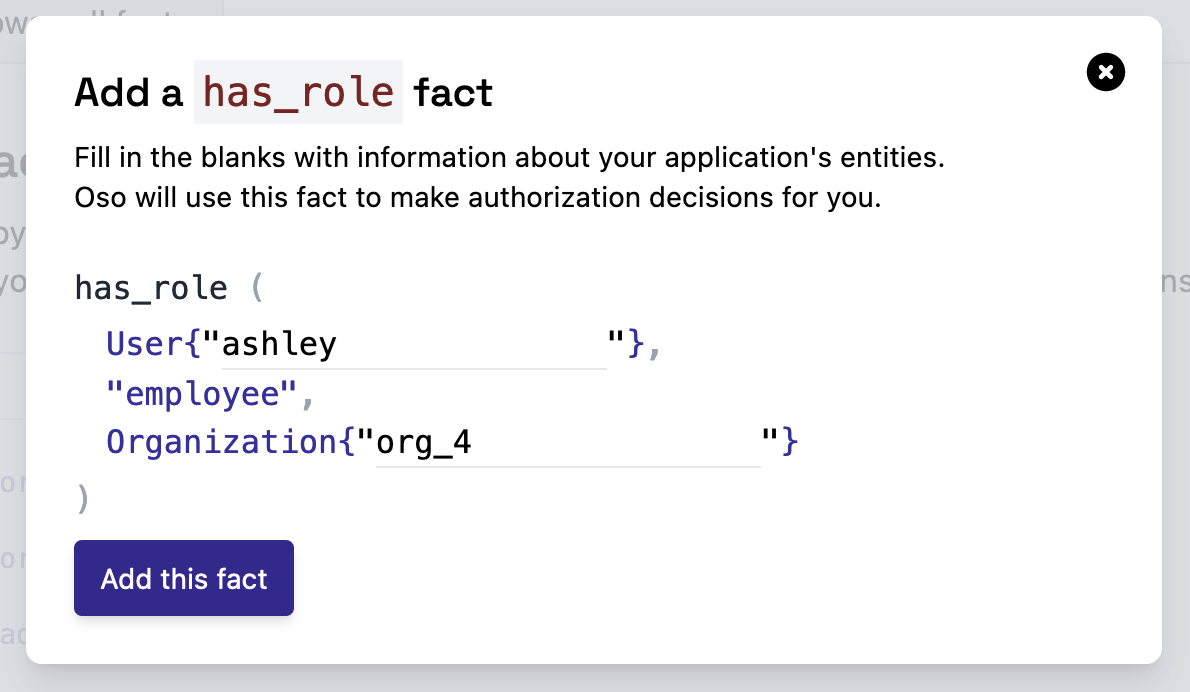
Next, let's tell Oso Cloud that Greg is an employee of Org 1, and Ashley is an employee of Org 4.
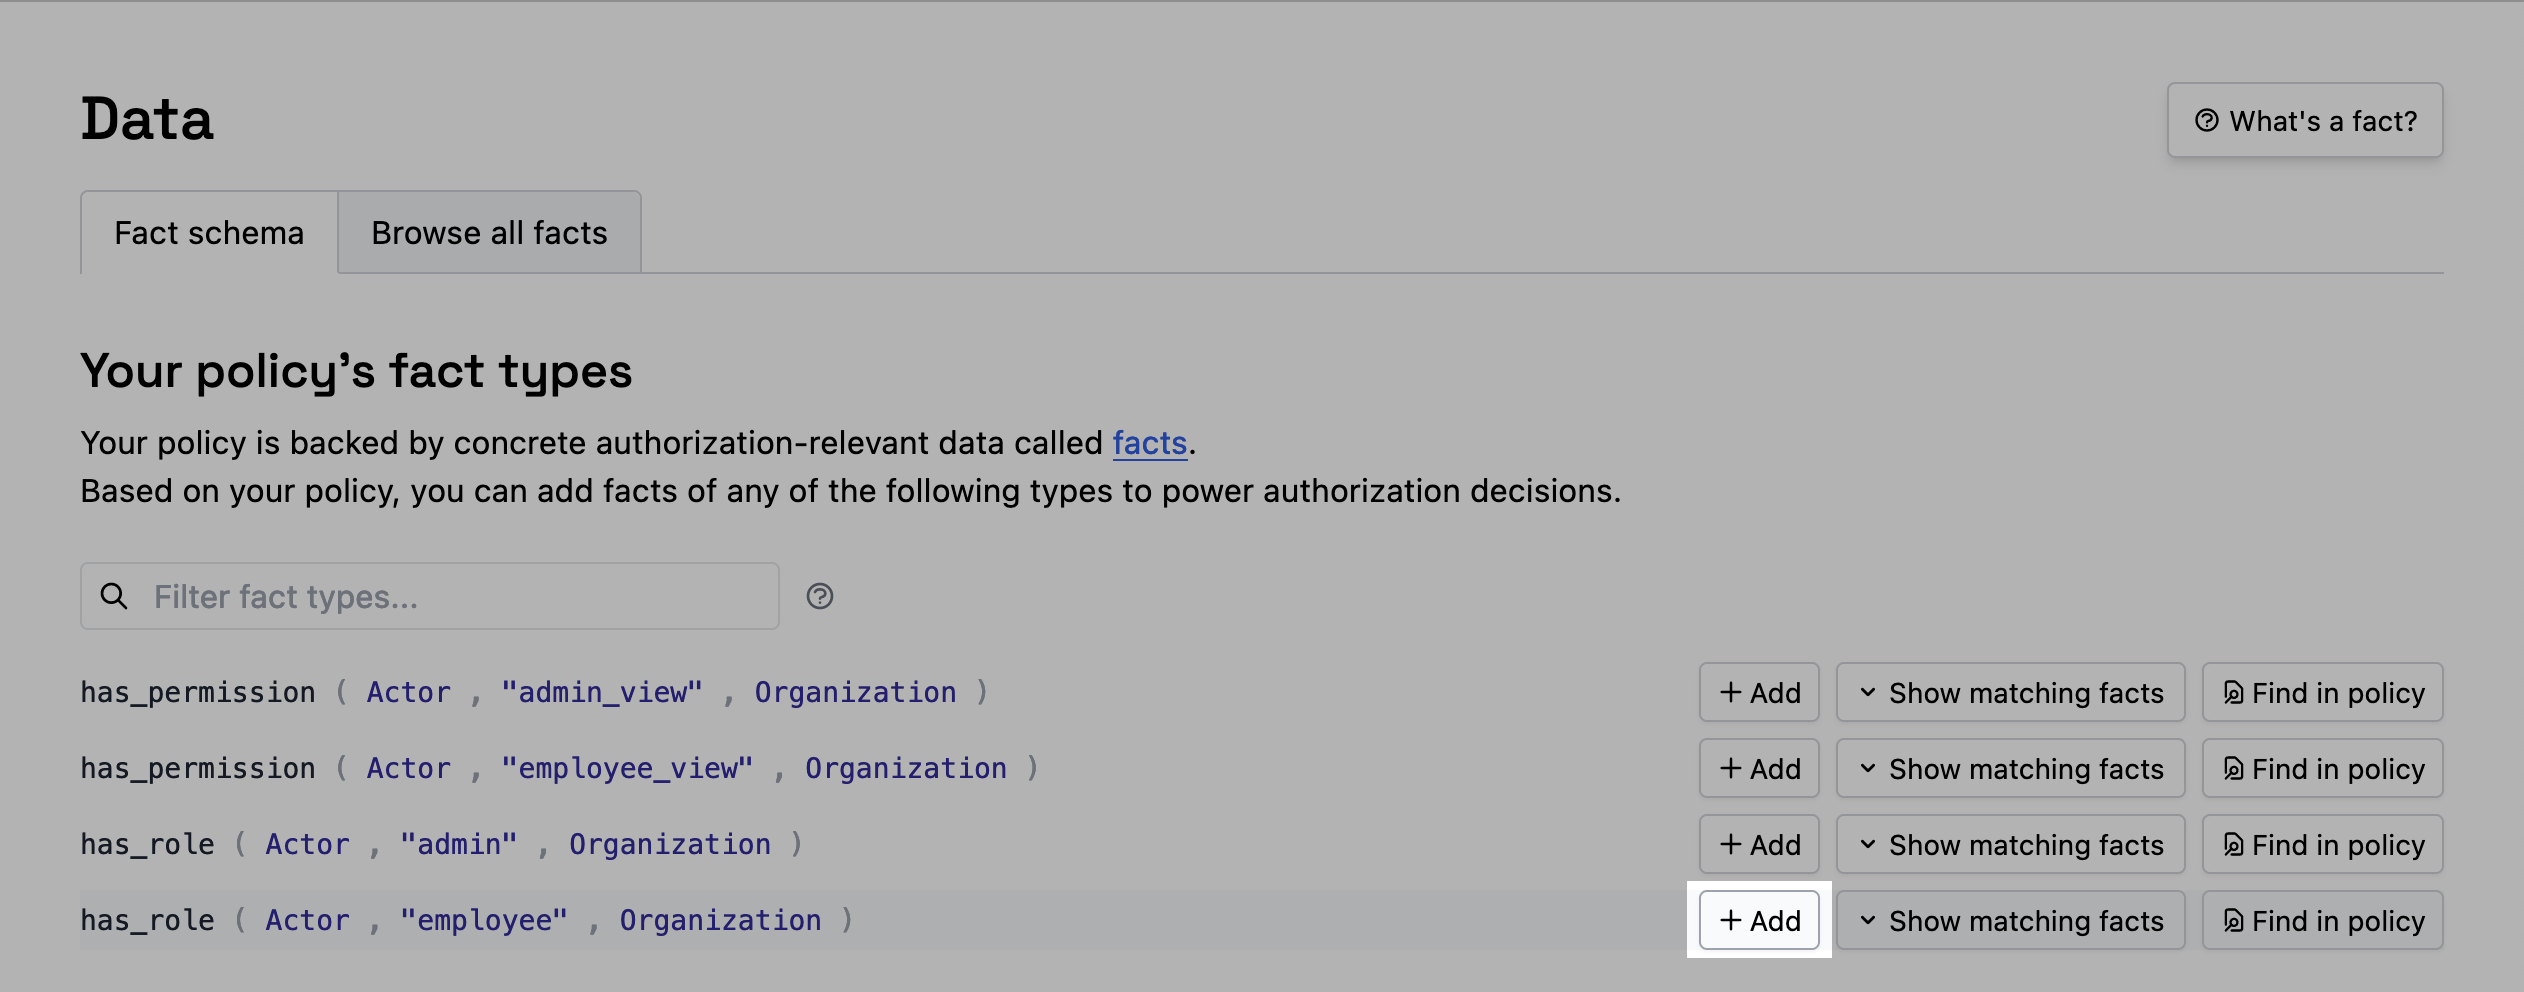
Find the has_role(Actor, "employee", Organization) fact type in the list, then click "Add".
Enter greg as the User ID and org_1 as the Organziation ID, then click "Add this fact".
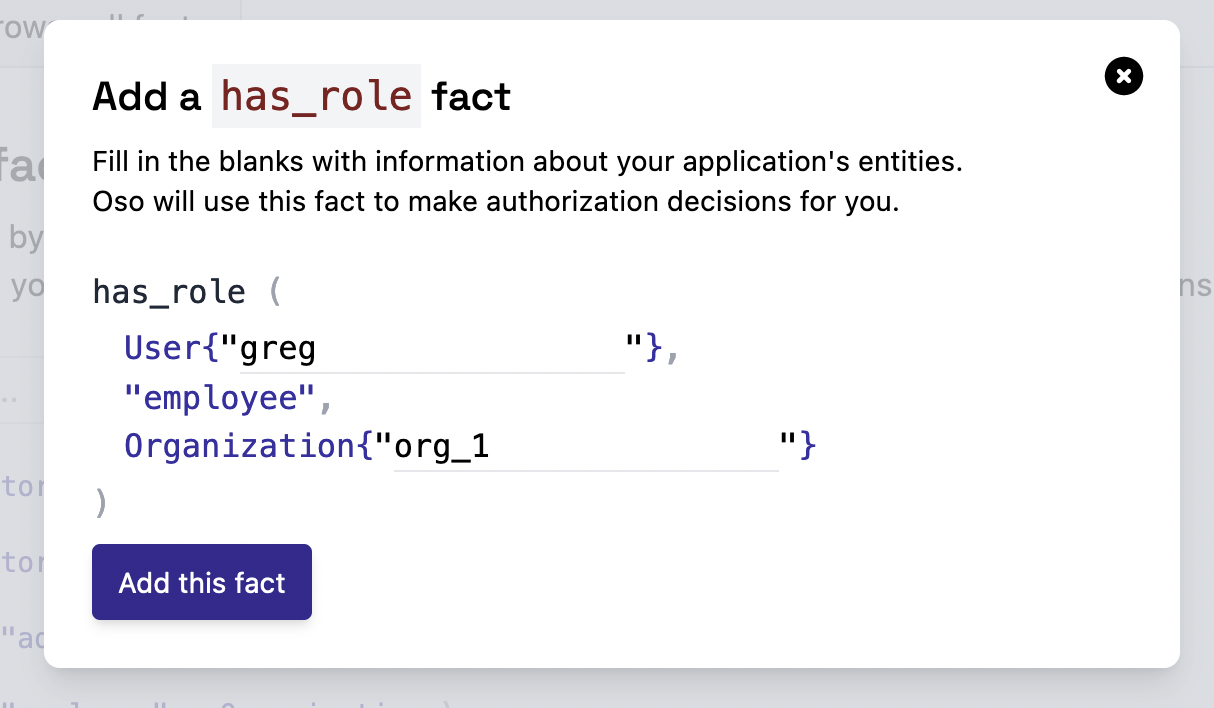
Repeat this process for Ashley by entering ashley and org_4.
Action Items
When you’ve finished, click "Show matching facts" next to each has_role fact type to ensure that you've added all the facts.
The has_role(Actor, "admin", Organization) facts should look like this:

The has_role(Actor, "employee", Organization) facts should look like this:

Additional Resources
Talk to an Oso Engineer
If you'd like to learn more about using Oso Cloud in your app or have any questions about this guide, connect with us on Slack. We're happy to help.